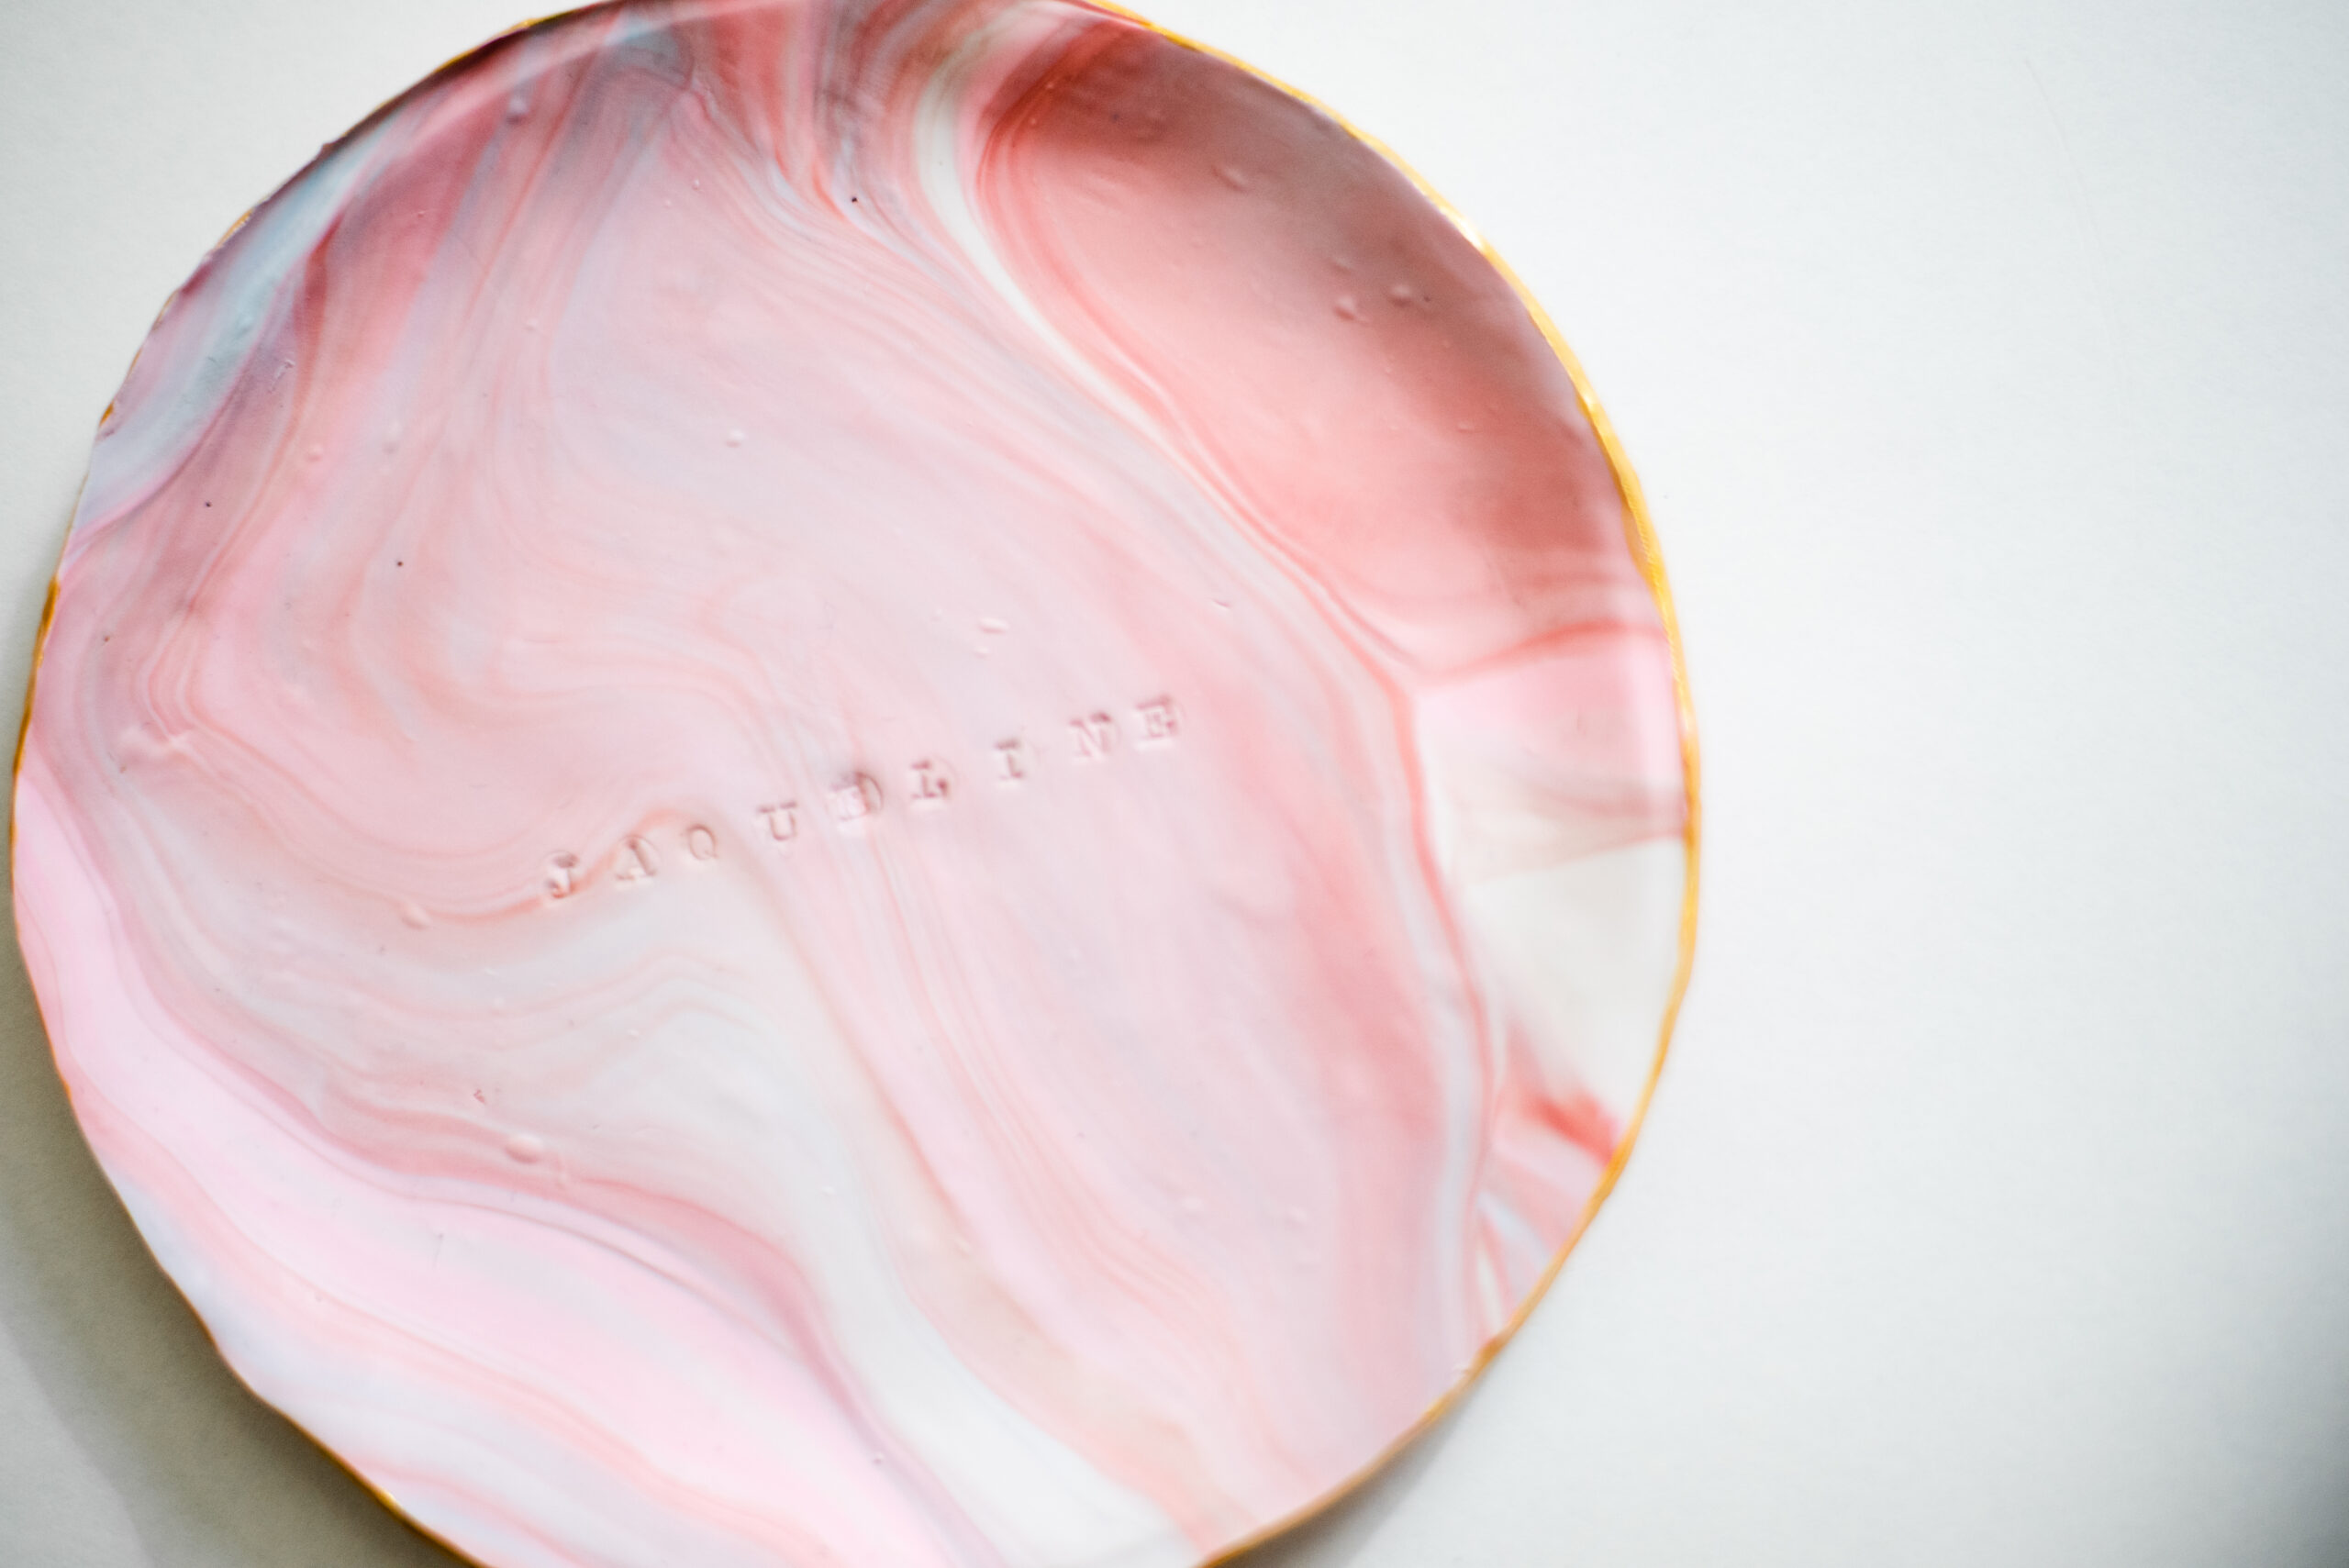
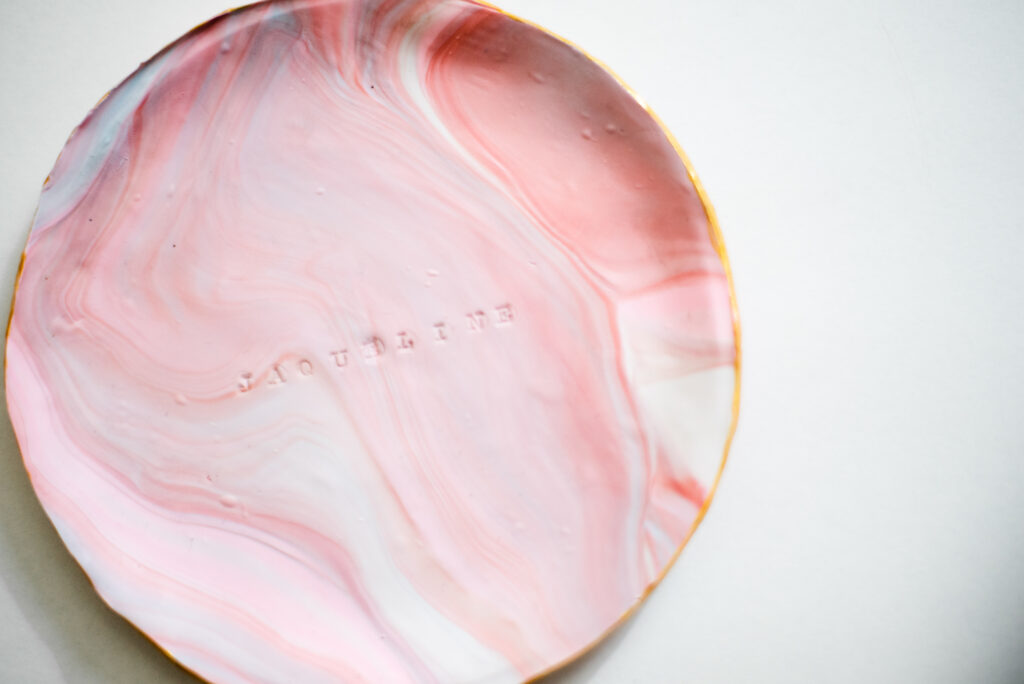
At the end of every fall semester the CDVL does “Secret Scottie.” We each get assigned one person and exchange gifts. This year, my assigned Secret Scottie said she enjoys handmade gifts, so I decided to make her a handmade clay marble dish. It could be used on a desk, a nightstand, and perhaps even the bathroom. To find out how I made this diy, keep reading.
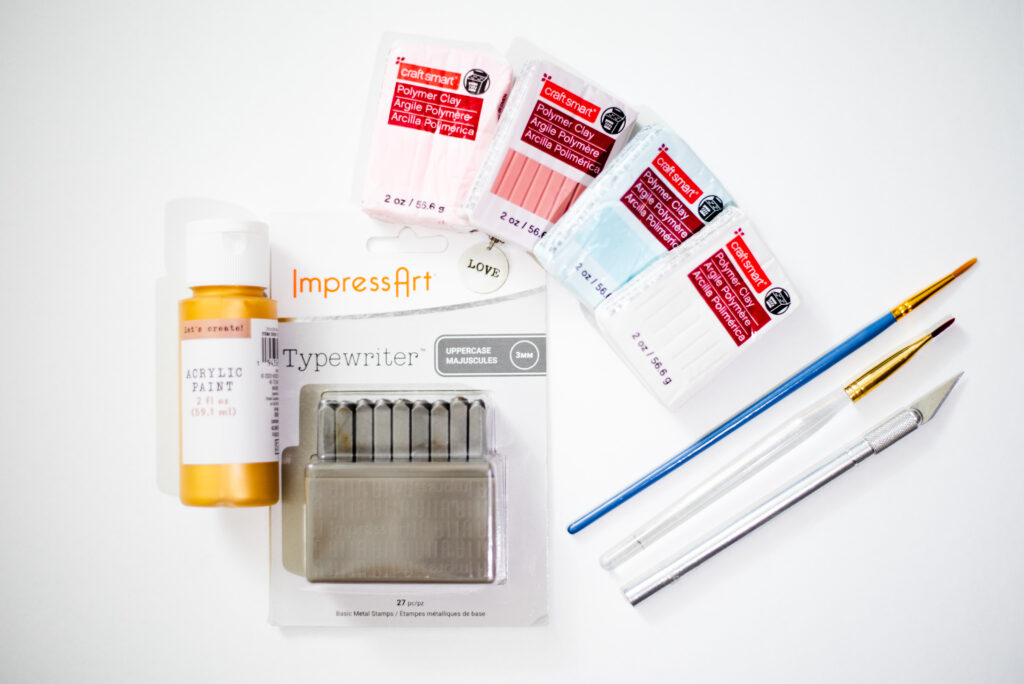
MATERIALS
Typewriter stamps
Polymer clay
Rolling pin
Gold Liquid Leaf OR Gold acrylic paint
Paint brush
X-Acto knife
Something circular for tracing
Oven-safe bowl
Oven
Glaze (optional)
DIRECTIONS
STEP 1: Collect your materials.
STEP 2: Roll different-colored pieces of polymer clay into long, skinny rolls.
STEP 3: Twist all the small pieces together into one strip.
STEP 4: Roll the strip smooth.
STEP 5: Fold the strip in half and twist it again.
STEP 6: Roll the strip smooth again, and then roll it into a ball.
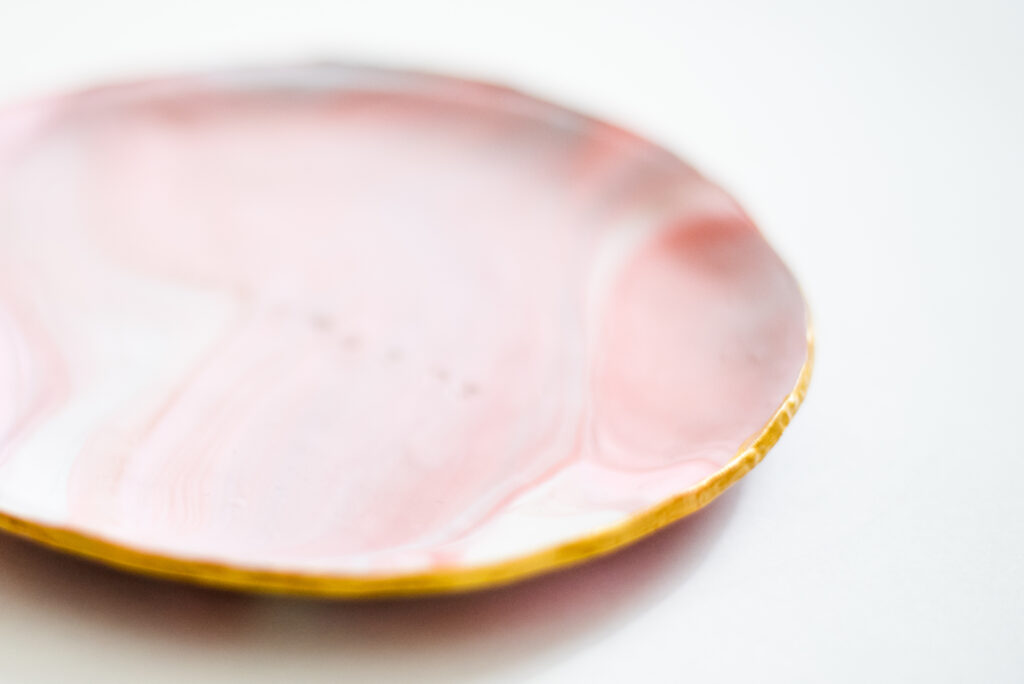
STEP 7: Using a rolling pin (or anything cylinder shaped) , flatten the ball until it’s about 1/4-inch thick.
STEP 8: Find something circular that matches the size you want your dish to be, and place it on top of the flatten clay. If the clay is not wide enough, you can always add more clay, form it back into a ball and flatten it again.
STEP 9: Run a knife around the bottom to cut out a circle.
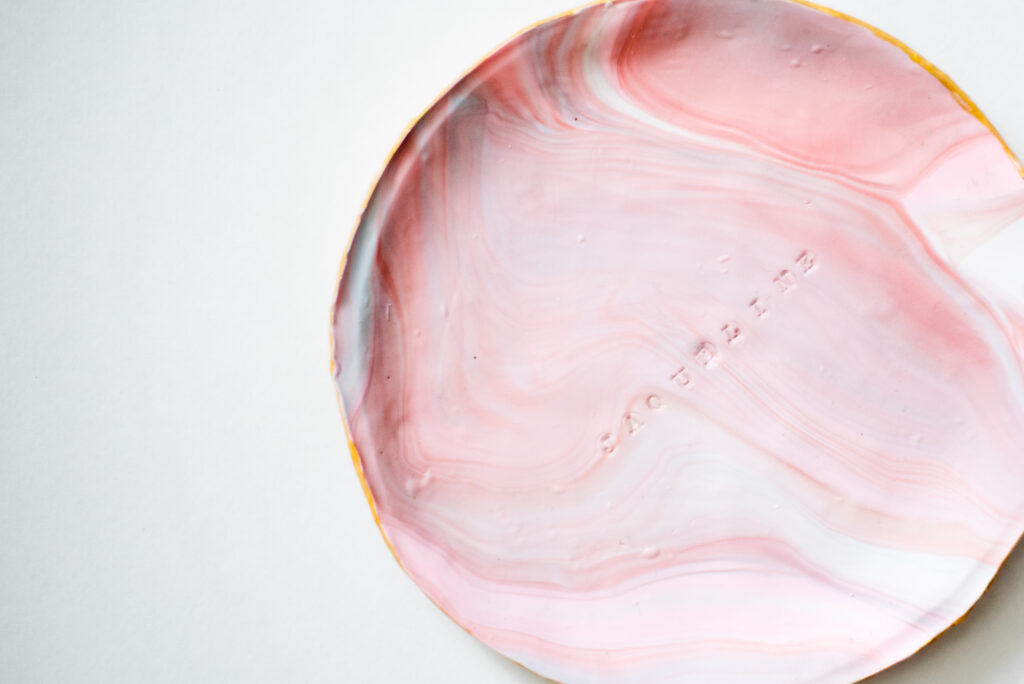
STEP 10: Using typewriter stamps, stamp out your custom name, phrase, or letter into the clay.
STEP 11: Take the clay and place it in an oven-safe bowl. Look for a bowl size that will create upturned edges and give your clay circle its “dish” shape. Bake it at 248 – 266° F for 30 minutes.
STEP 12: Let it cool.
STEP 13: Trace the stamped letters using Liquid Leaf gold paint (optional). Paint the outer rim using liquid leaf or gold acrylic paint. Let dry.
OPTIONAL STEP 14: If you want, add a layer of gloss glaze to seal your dish and give it a shinier look.